Always you have to take part in some parties with friends. When you have a chance to perform your songs, especially meet with some new friends, you need more practice. To find your weak points, recording your songs is a good idea. So you can playback the recording to improve your vocals. The wonderful audio recorder - Macsome Audio Recorded can help you.
Macsome Audio Recorded is a flexible audio recorder that can record voice from internal or lined in microphone on your Mac. It allows you to save audio directly to most popular MP3 or AAC formats. Even you can add the tags information to your recording.
In addition, Macsome Audio Recorded has a silence monitor. It can automatically monitor the input source and activate recording when the input volume reaches a specified level. The recording automatically stops once the audio level drops below a specified threshold. Macsome Audio Recorded will pause to skip silent and save your disk space.
With Macsome Audio Recorder, how to record your songs with microphone on your Mac? The following are the answers.
Step 1: Add recording device
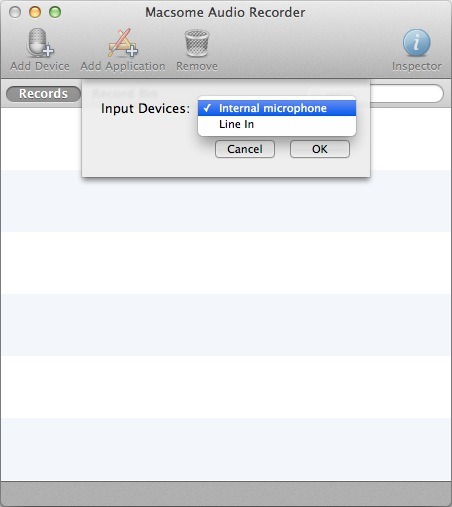
Click the Add Device button to open the adding window. The recording devices detected on your Mac will be shown in the Input Devices drop-down list. You can choose the device Internal microphone and click the OK button to add.
Step 2: Set the Silence Monitor settings
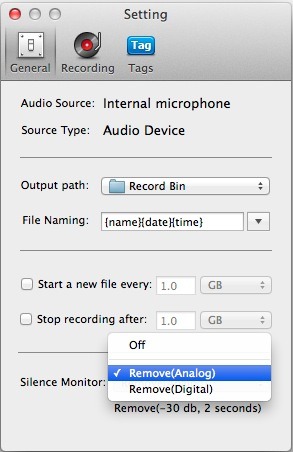
Select the device and click the Inspector button to open the Setting window. On General tab, set the option Remove (Analog) as the Silence Monitor settings. It will pause the recording to skip silent when the audio level drops down 30db more than 2 seconds.
Step 3: Customize the output format
On Recording tab, click the Output Format drop-down list and select the format For spoken word. It is the specifically customized format for microphone recording.
Step 4: Start the recording
You can click the  button to start device recording, for device needs not load at first. According to the silence monitor, Macsome Audio Recorder will active microphone to record with duration / size info when the audio has been detected.
button to start device recording, for device needs not load at first. According to the silence monitor, Macsome Audio Recorder will active microphone to record with duration / size info when the audio has been detected.
Step 5: Finish the recording
During the recording, you can click the  button to finish the recording and start a new one. And click the
  button to finish the recording. Switch to the Record Bin list and check the recorded files.
button to finish the recording and start a new one. And click the button to finish the recording. Switch to the Record Bin list and check the recorded files. 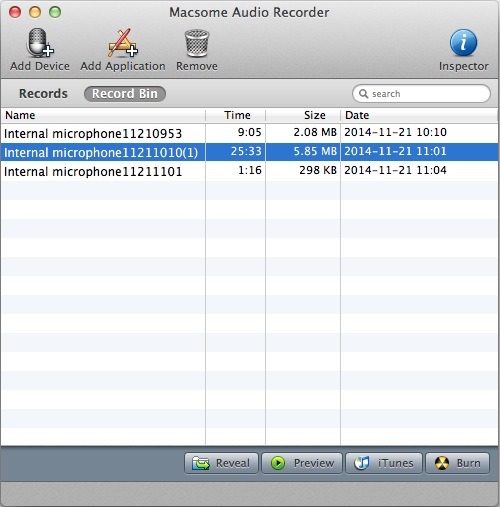
You can reveal the output path of recorded files. You can also preview recorded files directly in the Record Bin list. If you would like to manage the recorded files in iTunes, you just need click the iTunes button. And with Macsome Audio Recorder, it is easy to burn the recorded files to CDs.
Actually, Macsome Audio Recorder can also record audio from applications on your Mac like iTunes.app, Skype.app, Firefox.app, etc. It makes real-time audio recording easy and fast, no matter where the audio comes from on your Mac.
More info about Macsome Audio Recorder, please visit the URL:
No comments:
Post a Comment