Last.fm is a popular online service that offers both free and paid versions. Last.fm offers information on music artists and albums and if you create a user profile Last.fm allows you to track the music you listen to in Banshee for free.

Receiptify Last.fm takes this data and creates detailed receipts that users can use for personal record-keeping, sharing with friends, or even for business purposes. These receipts can include information such as the date and time of each song played, the artist and track name, and the duration of each listening session.
Receiptify Last.fm is a valuable tool for music enthusiasts who want to keep track of their listening habits over time.
How to Create Last.fm Receipts with Receiptify Last.fm
To create Last.fm receipts with Receiptify Last.fm, follow these simple steps:
1. Sign Up for Receiptify Last.fm
Visit the Receiptify Last.fm website and sign up for an account. Provide the necessary information to create your account.

2. Connect Your Last.fm Account
Once you have created an account, you will need to connect your Last.fm account to Receiptify Last.fm. Follow the on-screen instructions to authorize Receiptify Last.fm to access your Last.fm data.
3. Generate Receipts
After connecting your Last.fm account, you can start generating receipts for your music listening history. Select the time period for which you want to generate the receipt, such as a week, month, or custom range.
4. Customize Receipt Settings
Receiptify Last.fm allows you to customize the appearance and content of your receipts. Choose the layout, color scheme, and additional details to include in your receipts.
5. Download or Share Receipts
Once you have customized your receipt, you can download it as a PDF or share it directly from Receiptify Last.fm. Share your music listening history with friends, family, or on social media.
By following these steps, you can easily create Last.fm receipts with Receiptify Last.fm. Whether you want to track your own music listening habits or share your favorite tunes with others, Receiptify Last.fm provides a convenient and customizable solution for generating receipts based on your Last.fm data.
Other Tips you Also Like:
Creating your own Spotify receipt using Receiptify is a simple and user-friendly process, follow these simple steps:
Step 1. Search for the Receiptify website on a search engine or enter the URL directly into the address bar. An app is also available for installation, but for security purposes, we recommend using the website.
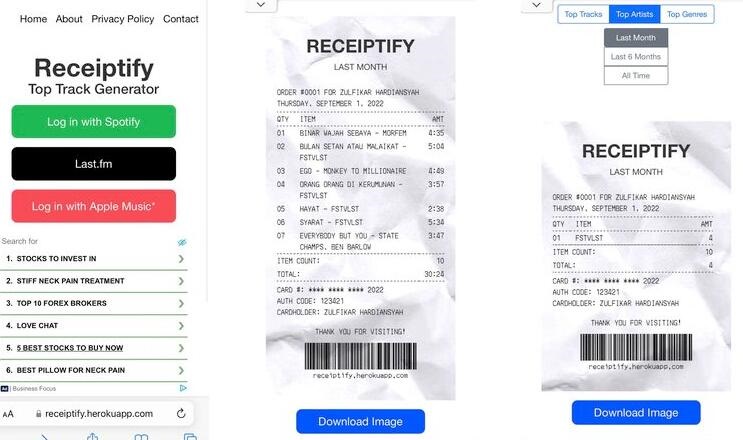
Step 2. Click the "Log in with Spotify" button to be redirected to Spotify's login page. You can then sign in using your Spotify credentials or a linked account.
Step 3. Upon logging in, you must grant Receiptify permission to access and analyze your Spotify usage data. You can generate receipts for your top 10 or 50 tracks, artists, genres, and searched albums.
Step 4. Choose your preferred time range for the receipt, selecting between options like "Last Month", "Last 6 Months," or "All Time." Receiptify will then process your Spotify data, this may take a few minutes as it analyzes your listening history and preferences.
Step 5. After the data processing is finished, you will be able to view your personalized Spotify receipt. The receipt will show your top tracks based on your listening patterns, and you can download it. When you're ready to download, navigate to the bottom of the page and find the "Share" button. Click on it, and from the options that appear, select the "Download" icon.
Once downloaded, you can share the image on social media platforms such as Twitter, Instagram and Facebook, just like any other image.
No comments:
Post a Comment